Thursday, January 5, 2012

A new desk


This will be desk #3 that I've worked on in the last 9 months. Unfortunately I didn't take pictures of desk #2, oops. But i got starting(ish) pictures of desk #3. We'll see how successful I am with the in progress and finished product pics of this one!


The previous desk had a Sounders theme and I have visions of Mariners homage with this one!


Sorry, I had already removed the handle knobs and started filling some gouges before I realized I really should take some before shots.

Tuesday, November 8, 2011

Monday, November 7, 2011

Shoes? No, Hunny. SHOES!!

These shoes are relatively comfortable (they are heels afterall), and pretty standard in silver. But sort of scream Prom 1999 to me. I think they need some updating.


I found some inspiration at Brown Paper Packages with some green shoes she painted black and added a flower bow. So I tried that first, painted them a great peacock color. The color was a fun pop, but still dull. They (I) needed more.


I did a little more searching and found Welcome to My Home she was reading my mind and knew JUST what I needed. Off to the craft store I ran:


After about an hour of Wonder Years and Glitter Glue I could see my visions coming into reality. I just needed to let them dry and spay them with a clear coat to seal the glitter on.


This morning I woke up, ran downstairs to check on my masterpiece and voilĂ .

Monday, June 20, 2011

a $1.00 desk

I finished one! Remember that post where I showed you all the 'summer projects' I had hidden about my house. I got one done!

I got this cute little desk at Value Village on $.99 day. I spied it tucked in a corner back in the furniture department and was ecstatic when it had the color of the day sticker on it! However when I asked the furniture attendant for help she informed me furniture is not included in the color tag sale. I thought that was weird, but I wasn't going to fight her on it so I went up to the front and to purchase my other items. I happened to mention to the cashier that I thought it was odd that furniture is included in the color sale when it is 50% off, but not on $.99 day. She told me, "no it's included." I'm sure I started at her for a minute with my mouth open as my brain tried to reconnect the dots and change the course of the conversation. I managed to tell her that in that case I wanted a desk I saw in the back and she went on to tell me that if they give me any grief about the desk I could just tell them Margie said so.

There was no longer an attendant back in the furniture department so while I was glad to not get any grief, I also had no help getting my nice little find up to the front of the store. I slowly pulled her down the aisles and made my way back up to my new best friend Margie. She checked me out and then I was out the door with a couple shirts and a "new" desk - all for under five bucks.


First I stripped the top with a heavy duty stripping agent, vinegar and water the shellac and cheap stain came off to reveal some kind of beautiful wood.


I then used my super adhesive glossy cover primer and primed then painted the base of the desk and drawer fronts an ivory color. Somehow I managed to not take pictures of this part. Perhaps is was the distraction of Saige "helping" me prime...or when she decided to put green handprints all over the ivory drawer fronts with the inkpad she'd found. Whatever it was, I just didn't get that part photographed. sorry.

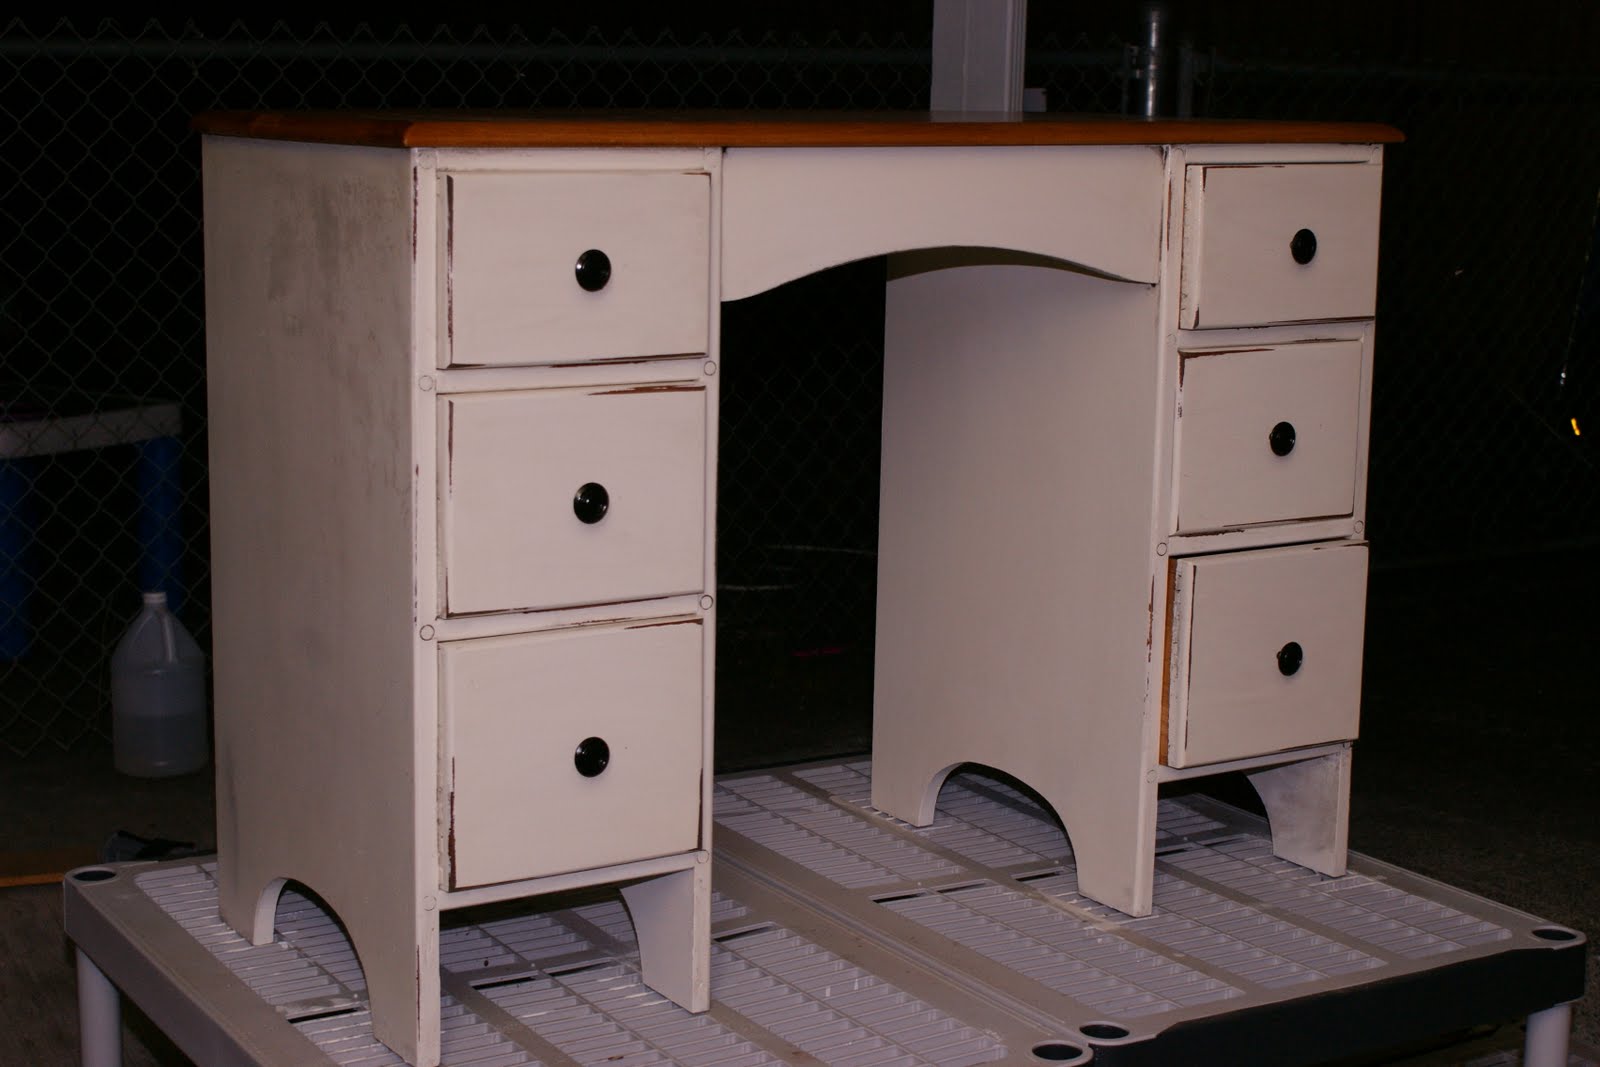
After painting, I distressed a few of the corners and rubbed the whole thing down with black antiquing glaze. There must have been some kind of chemical or something on the left side of the desk because (as you can see in the picures) the glaze came out funky on that side. I don't know how to fix it, or to have avoided it, that's what I thought the primer was for...

I peeled off the protective tape and newspaper I had covering the top as I painted and pondered on the bare wood for a while. It really was a lovely color. Was I prepared to risk changing it? I decided I wasn't. So I busted out the polyurathane and gave it several good coats. I just love the finished product!


yes, I should have taken pictures of her in the daytime. Or waited until tomorrow. But I have a second to sit down and post right now, so I figured I'd better do it or it's going to be a month before it's done!

my small part

In my quest for fresh eggs (read, getting chickens) I've read about rain water collection and decided to take the plunge (haha, pun not intended). I contacted Coke and was able to procure four plastic food grade barrels. The contact at Coke even gave me a tip as to not use blue or black barrels for water that would be going on vegetables.

I then scoured YouTube for some videos on how to make a barrel into a rain water system and voila. Okay, so maybe not voila but I was on my way. A couple trips to the hardware store and a few hours of labor later I have two single and one double barrel rain water collection/irrigation systems.

Sadly I did not take picture throughout the process. Perhaps next time; if I have decent luck selling the two single systems on craigslist.

For now you can marvel at the finished products.


Sunday, May 15, 2011

A sneak peak

Just thought I'd give a little peak at the projects I have up my sleeve for this summer!


Spare Bedroom Storage Cabinet:


Desk:


D's Dresser:


Nightstand

A Table


As I drove to pick up a friend's kids to take to school I spied this table with a little "free" tag attached. How could I not at least stop and take a peek at it! I couldn't resist, it was calling to me. So I loaded it up and brought it home.


It definitely needed some TLC. It looked as if it had been kept in the craft room or garage, and kept a puppy company at some point as well. yikes. I took it as apart as I could and started scraping, stripping, sanding, filling. For a beginner I was pretty proud of the process.


The dog chewed sections were by far the hardest. I took some wood filler paste and just tried to fill and fill and shape until most of the splintery bits were smoothed.


Once the surface was prepared I painted the under skirting and the legs black and stained the top "Golden Oak" I then sealed it with minwax semi-gloss polyurathane and moved it inside. I think this little beauty is going to be happy with it's makeover and new home!


Before/After